If you take a look inside my kitchen cupboards, you will find a mountain of baggies. Not empty though, they are all filled with powders and mixes, to make my cooking faster. If you're pressed for time, take one day a week to pre-make mixes. You'll be amazed at how you can fly through suppers! I took one day (actually only half a day) to make 7 oatmeal breakfasts, 3 Hamburger Helper sauce packs, 3 beef gravies, 3 chicken gravies, and 4 burritos to freeze. That's just from 9 a.m. to 1 p.m. and I even took a break to go buy some missing ingredients. And I did this all with a 2-year old running around my legs!
You don't have to stick to just powder-mixes either. You can pre-cook and freeze meals as well. If you took just one day per week to prepare for the rest of the week, you could save piles of time on the other days (especially if you have a full-time job).
Tuesday 11 December 2012
Sunday 2 December 2012
Winter Container Gardening Indoors
Here in Manitoba, Zone 3 for you gardening buffs, winter means a long, boring stretch of time, dreaming of my garden. This year I decided to do some houseplants to kill that winter boredom, however I'm not a flower person! If I grow something, it has to be edible or productive in some way (as my uncle says, "If you can't eat it or smoke it, what good is it?").
So I started three cotton plants (I had to give them to my mother because I had no south-facing windows. They sprouted nicely but once they got to about four inches tall, just couldn't go any furhter without more light). After my cotton babies went to a sunnier home, I started a pumpkin (purely as an experiment) which has grown to about six inches tall, and two green onions which are continuously sprouting no matter how much I chop them up into my food.
My aloe vera plant that my mother gave me is doing quite nicely. It's not big enough for harvesting to make an aloe vera drink, but it's handy to snip off a tip whenever I burn my fingers. My potatoes didn't sprout, but I probably didn't wait long enough between cutting and planting, so they probably just rotted.
I also ordered brocolli and lettuce seeds, which will be arriving soon. Hopefully they do well, since they are low-light plants.
Sunday 11 November 2012
Minimizing
Since I mostly write about how to be somewhat self-sustaining and "just in case" preparation, I have been exploring the idea of being a minimalist. If you've never given it a thought, let me come at this from a different direction:
- If you're a prepper, you obviously like to have a bit of everything around in case you need it... but what if something happens and you can't find what you need due to TOO MUCH STUFF?
- If you like to be independent from "the man".. then why buy so much? All you do is clutter up your home and keep supporting Big Box Company and their overseas sweat shops.
- If you're on board and think "Hey yah I should declutter... I haven't work that pink shirt in two years and have 4 different turkey basters" well then good job!! Take it step-by-step and room-by-room to slowly decrease your "junk"...
This is not saying you have to contribute to our landfills by throwing things out! Please do what I did and put an ad on the local community boards or in the newspaper saying "FREE STUFF TO GIVE AWAY" and people will flock to take it off your hands. My tip: put all your giveaway stuff in one area (for me it was the walk-in closet off the laundry room) so that you can tell people "anything in this room is free", then they don't have to dig through several areas and they know which items are off-limits.
One man's junk is another man's treasure!
Thursday 1 November 2012
Post-Halloween Pumpkins
I was very lucky to travel into the city yesterday, on Halloween. Superstore happened to have three huge bins of pumpkins and a sign saying "FREE PUMPKINS". They were the "rejects", ones that probably wouldn't sell by night, so I grabbed two of them (not being greedy). These pumpkins will not be jack-o-lanterns though... they will be for pie. Think about that... free pie! Canada is fortunate to have an abundance of food, even in places we don't think of. Superstore thought they were giving away Halloween decorations, but I saw a way of minimizing the family food budget.
Head over to the Recipes page for my recipe on turning regular large pumpkins into pumpkin pie. Great way to use up your jack-o-lanterns!
Friday 26 October 2012
Soldering
I was busy as a bee this afternoon, soldering some of my solar panels together, finally!! My "Red Green" dad decided to take the first crack at it, so he would know how to instruct me on putting them together. Turns out we had to do it differently than my instructional video that I'd been watching.
I will take a video of how I'm putting them together and post it on the "Alternative Energy" page within the week.
Tuesday 23 October 2012
Read About it!
I recently bought a homesteading book, bursting with so much information that I haven't gotten through it all! So I thought I would share some good reads with you as well. If you are a "doomsday prepper" then you'll definetely want to buy these books because if something happens, you will not be able to access information on your computer - only books will do!
Here is the book I bought:
Homesteading: Back to Basics
And here are a couple more you might be interested in:
How To Grow Lots on a Small Amount of Land
The Backyard Homestead: Raising Small Animals
Here are some more items that I've checked out:
Here is the book I bought:
Homesteading: Back to Basics
And here are a couple more you might be interested in:
How To Grow Lots on a Small Amount of Land
The Backyard Homestead: Raising Small Animals
Here are some more items that I've checked out:
Monday 22 October 2012
Making Cheese
I found a recipe to make Queso (which is really just the Spanish word for cheese) but this specifically is a "frying cheese" meaning it won't melt.
Heat 2 c. milk to 180 degrees and then stir in 4 Tbsp vinegar. It will immediately separate the whey and start forming clumps. Keep stirring 5-10 minutes (I only stirred 5 minutes). Then pour into a cheesecloth-lined sieve. You don't need to press the cheese (unless you want to), you can keep it in a ball.
After making the cheese, I stored it in a ziploc bag with some paper towel because it still seemed a little damp to me. The taste was good (a little vinegar-y aftertaste) but not too bad for cheese that I whipped up in 10 minutes!! Baby tried some this morning and seemed to like it. Husband (who is Colombian and therefore Queso is one of their main cheeses) tasted it last night and deemed it acceptable.
Tuesday 16 October 2012
Chocolate Syrup
With no more gardening to do (except watering my few indoor plants... namely cotton, cilantro and potatoes), my new project is finding DIY recipes for various mixes instead of buying them pre-assembled from the store. For example, Hamburger Helper mix, chocolate syrup for milk, Bisquick mix... all of them I plan on making myself. I've already tested out the Hamburger Helper mix and once I make a huge batch I will put the recipe on here. For now, I'll put the chocolate syrup recipe up, enjoy:
1 cup unsweetened cocoa
2 cups sugar
1/4 tsp salt
2 cups cold water
Stir all together and keep stirring over medium heat until it thickens up. Then add 1 tsp vanilla once it cools off. Store in the fridge up to 2 weeks.
I personally am going to see if this freezes because I love making chocolate milk but can't always take the time to whip up a batch of syrup every couple days.
Monday 8 October 2012
Winter Knitting!
Now that the cooler weathers are here, I start to pick up my needles and hooks to make warm coordinates for gifts and for immediate use. Baby has already outgrown all last-year's winter items (babies do that) so I have already made her two pairs of mitts and two toques.
I will be posting a new crochet toque pattern (very easy) in the Crochet section - it is not the exact same pattern I follow, but it's very close and easily customizable for those who already know how to crochet.
If you want to "spice it up" a bit, make it in a fruit colour, and then switch to green at the top to look like a tomato or strawberry or what have you. Babies always look good in whimsical hats!
Tuesday 2 October 2012
Real Pumpkin Pie
I will not be posting this on the recipes page quite yet, wanted to share it on the main page first. We bought two jack-o-lantern pumpkins but I decided I wanted to EAT them instead. There is no rule saying the big pumpkins are not edible, so we made them into pies! Here is the recipe we used:
1) Cut pumpkin(s) in half. Take out all seeds and fibres.
2) Place open-side down on a shallow pan with water at 350 in the oven.
3) Cook for 45 mins or until easy to pierce (mine was fine at 45 mins)
4) Make the pie pastry. Follow your favourite pastry recipe or this one below:
Mix together: 5 1/2 c. flour, 1 1/2 tsp salt, 1 tsp baking powder, 3 Tbsp brown sugar. Cut in 1 box (pound) shortening with pastry-cutter or two knives. Add to the dry 1 egg. Put 1 Tbsp vinegar in a 1-cup measure and fill the rest with cold water. Add wet ingredients to dry. Press pastry into a solid mass with a fork, roll it out and line a pie pan.
5) Blend all the pumpkin in a blender (if it wont blend good, add 1 egg to make it more liquidy). To make the pie filling combine 2 c. pureed pumpkin, 2/3 c. sugar, 2 tsp pumpkin pie spice, 2 eggs, and 1/2 c. milk. It will be a bit soupy, that's fine.
6) Pour into unbaked pie crust. Put in 425 oven for 8 minutes then lower to 350 for 30-45 minutes or until it doesn't jiggle anymore.
Note: if you are freezing this, 1 3/4 c of the pie filling mix fills one small pie. I freeze in individual portions to make it easier!
Friday 28 September 2012
Productive Day
My mother came over and we had quite a productive four hours! We canned 2 1/2 pints of tomato sauce, made pumpkin pie (from scratch!!!), and sampled her Roasted Tomato Soup that she'd made from a recipe printed in our local newspaper.
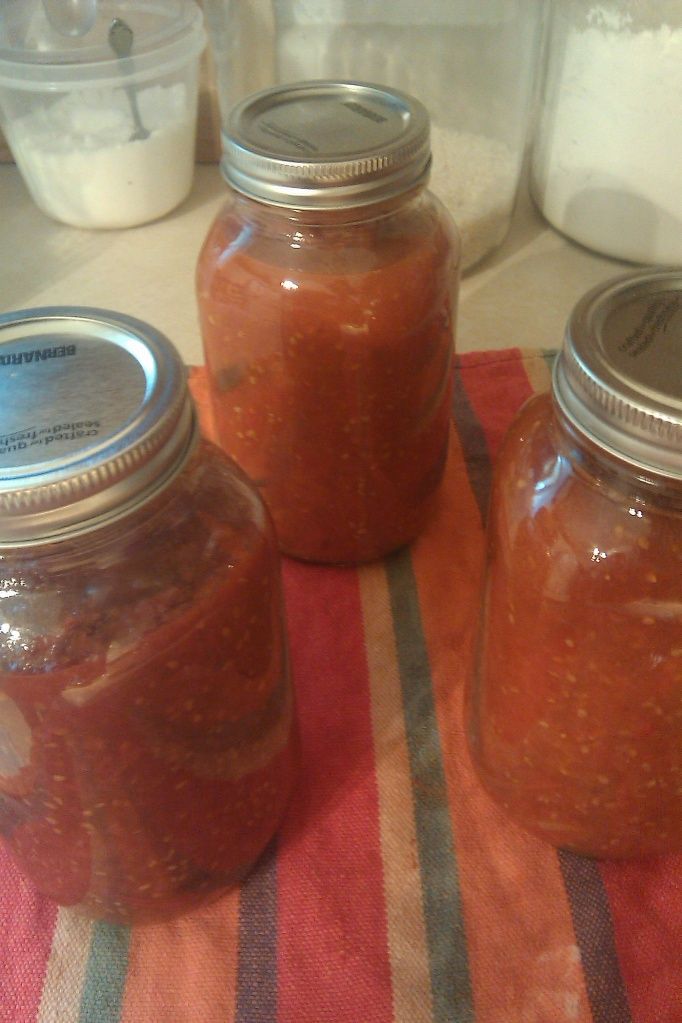 In total that makes 5 1/2 pints of tomato sauce that I have canned. I gave one pint to my mother as thanks for letting me use her canner all summer. I also dehydrated a batch of tomatoes, but honestly I will never do that again. What a waste of time. So much cutting, gutting, and the result is less than satisfactory. I still have more tomatoes but those will be made into omelettes, sandwiches, and soup.
Sunday 23 September 2012
Free Stuff
I have started a new page (see the right-hand side) called "Free Stuff" - a place to connect with people who want your "junk" and a place to see if others have something you've been looking for. Please note it's entirely for south-western Manitoba, however if you're from further away and willing to ship at no cost to the other party, by all means, post your item :)
Saturday 22 September 2012
Solar Cells
Just updated the "Alternative Energy" page... that page will definetely be one that you want to keep your eye on through the winter. Since I can't do any gardening, my solar panels are going to be my winter project. Step One is finished, now on to Step Two!
Friday 21 September 2012
Maple Syrup
While taking baby for a walk, I discovered the most amazing thing....... our house is surrounded by Manitoba Maple trees! When I told my husband of my discovery, he didn't know that it meant sweet, homemade syrup, since he's not from Canada. His country does not have Maple trees, and his language does not even have a word for syrup, calling it "honey" instead.
So this winter/spring he is in for a sticky surprise when I try my hand at tree-tapping!
Just a note to everyone: I live in a small town, not in the country. So if you are a "town homesteader" like I am, take a look around the neighbourhood to see if you or any of your neighbours have trees that can be harvested, that nobody ever noticed!
Tuesday 18 September 2012
TEOTWAWKI
So you're probably wondering "What the heck is TEOTWAWKI?" - this means "The End Of The World As We Know It". I did not coin the phrase, it's been hovering around for years. However I wanted to use it as something to make you think. I'm not talking about a big catastrophical world collapse right now, just the end of YOUR little world. Obviously you use a computer, or you couldn't see this blog. But what if *gasp* there was no more electricity ever? All your survival info, recipes, and other handy information is probably on your computer.
The reason I haven't posted in a couple weeks is because I have been printing off all my "handy info" to store in a binder in case of emergency. Some of you might print off "what to do in an earthquake" and some of you might print off "how to shoot zombies with an AK47" and all of it is fine, but it will do you no good if you can't access it.
So go print it off.
Right now.
Go.
Friday 7 September 2012
Tomatoes in Abundance
Well we picked another two grocery bags of tomatoes from the garden and didn't even make a dent. They are quite abundant. I can see myself making a million cans of pasta sauce this fall once everything is picked yummmmm.... My husband also picked all the green onions for me (well... not all. They are spread over everywhere) so really there's not much left to harvest except the rest of the tomatoes and the couple muskmelons that might not be big enough by the time frost hits. It's getting pretty close... probably within the next week we'll have our first frost, so we have to hustle getting the veggies picked.
Click here for a picture of my tomatoes
Click here for a picture of my tomatoes
Thursday 6 September 2012
Peck of Pickled Peppers
Had a very productive day - even before lunch I was doing some canning! I picked a heavy plastic bagful of tomatoes from the garden (it went down to only +6 Celsius last night, so it's getting close to freezing), I managed to get enough peppers to make one small jar of pimentos, and the cucumbers I got from my aunt went towards another cucumber salad and three jars of pickles.
The pickle recipe is on the "Recipes" page, head on over. As for the pimentos, that's easy:
1) Chop and take out the seeds of your hot peppers (I used mostly banana peppers with some red chiles for colour)
2) Fry the peppers in a bit of butter
3) Meanwhile, heat up a cup of oil.
4) Once the peppers are soft, put them into your jar.
5) Pour the hot oil overtop (don't burn yourself!), cover, and tighten lid.
There is no need to process this in a canner - the heat will seal it and you will hear the lid pop quickly.
Tuesday 4 September 2012
Liquid Laundry Soap
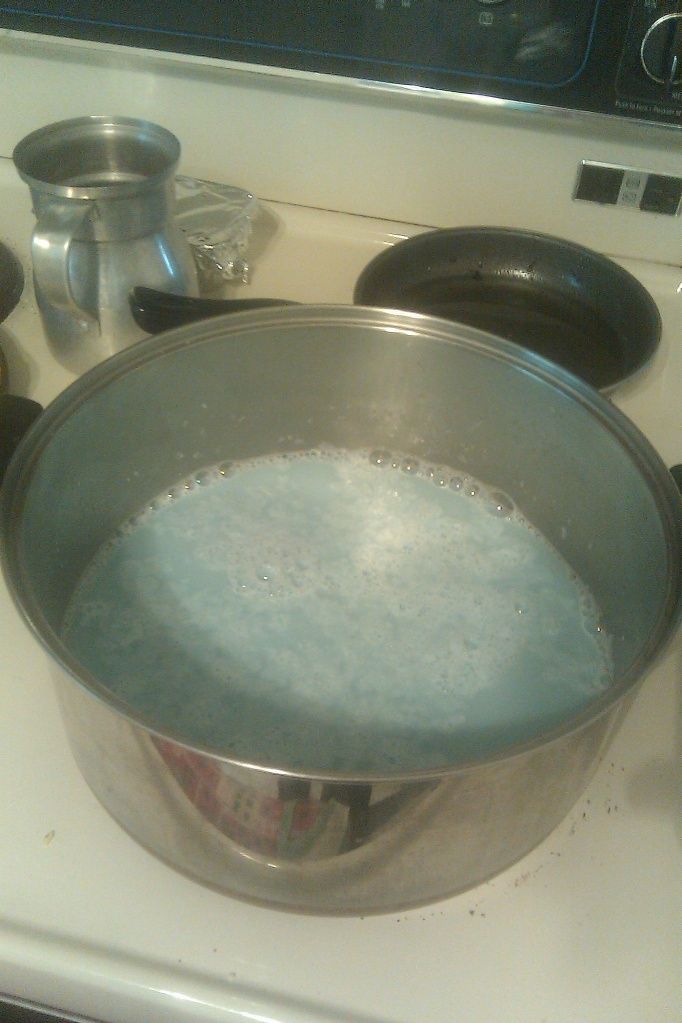
Please check out the "Make Your Own" page for a new update (actually 2): how to make your own washing soda, and how to make your own liquid laundry detergent. I am currently in the process of making it myself as you can see below!
Monday 3 September 2012
Dill Pickles
Check out the recipes pages for a new recipe - how to make dill pickles, super-easy! This is the kind where canning is optional, although I certainly plan on canning mine to extend the shelf-life.
Saturday 1 September 2012
New Topics
As you can see, on the right-hand side there are several new topics and subjects. I hope to have all these pages full of information before the end of September, so keep an eye out!
UPDATE: About Me, Manitoba Markets, Gardening, and Recipes pages are all completed so far.
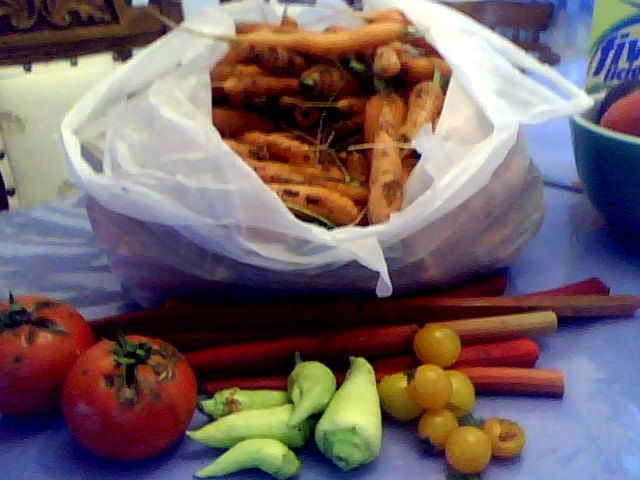
In other news, I pulled up all my carrots today and had a busy day making a double-batch of carrot soup, chopping up a single container of carrots to boil for another meal, and scrubbing another two large bowls of carrots, because I haven't decided what else to do. There were also a couple tomatoes (they went onto a pizza), some peppers, and the very last bit of rhubarb.
UPDATE: About Me, Manitoba Markets, Gardening, and Recipes pages are all completed so far.
In other news, I pulled up all my carrots today and had a busy day making a double-batch of carrot soup, chopping up a single container of carrots to boil for another meal, and scrubbing another two large bowls of carrots, because I haven't decided what else to do. There were also a couple tomatoes (they went onto a pizza), some peppers, and the very last bit of rhubarb.
Tuesday 28 August 2012
Super-Easy Harvest Recipe
Here is a delicious salad made almost entirely from garden items! I made this last night for supper and even my "I'm not a rabbit, don't feed me salad" husband loved it!

Chop up 2 cucumbers, 2 tomatoes, about 1/2 " of a cheese block, and 1/4 of an onion. Add 1/2 tsp salt and 1 Tbsp ranch dressing. Mix it up and enjoy!
Chop up 2 cucumbers, 2 tomatoes, about 1/2 " of a cheese block, and 1/4 of an onion. Add 1/2 tsp salt and 1 Tbsp ranch dressing. Mix it up and enjoy!
Saturday 25 August 2012
Today's Harvest
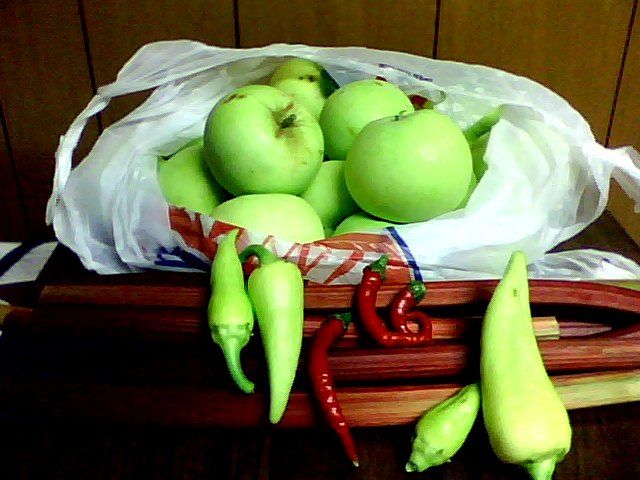
I decided not to dig up my potatoes until my husband is available to help me lift it all, and since he didn't want to go out in these high winds, I just took baby to the garden for a "mini-harvest". We got a full bag of apples (they must be finished now, I'm sure!), rhubarb (the rhubarb is definetely done and starting to die for winter), and SURPRISE, some peppers!! I honestly don't know what we'll do with them since we don't like spicy food. So if anyone has some recipes for turning these peppers into something not-so-spicy, let me know!
Tuesday 21 August 2012
Solar panels
Well I finally did it! My husband let me have $40 and I used that to go solar-panel shopping. As a woman I felt the lure of shoes, skirts, and hair accessories, but think about it: if you think something big is gonna happen, or if you are one of those who think 2012 is the end of the world (I don't), or if you just want to be safe rather than sorry... why would you buy shoes when you could buy solar panels? Shoes won't produce electricity or heat your house in winter or provide light to your plants when growing anything is impossible.
In my opinion wind power is a better way to go (more productive, and cheaper to assemble) but if you have the extra money, make an investment in your survival, rather than your looks!
In my opinion wind power is a better way to go (more productive, and cheaper to assemble) but if you have the extra money, make an investment in your survival, rather than your looks!
Sunday 19 August 2012
Today's Harvest
Already this summer I've gotten dill, rhubarb, raspberries, and just yesterday pulled up a few (not all) of my potatoes. And I had already processed some of the green apples, but now they're fully ripe and ready for picking. I left only a few on the tree, and this is the rest that I harvested.

Saturday 18 August 2012
Make a Wood Clock
I remember a beautiful wooden clock hanging in our house and thought I could make one myself with all the wood slices in our garage. All those rounds of wood just sitting there, and not a thing to do with them. Well, no longer! Here are instructions on how to make your own clock out of a wood slice, if you happen to have a felled tree:
You will need:
- sandpaper
- enamel
- a foam brush
- a wood burner
- a drill
- a round/oval slice of wood
-polyurethane
- a DIY clock mechanism
- batteries
- a way to hang the clock
1) Sand the surface smooth
2) Apply enamel to the hands of the cloth. Allow it to dry completely, then do it once more.
3) Cut out some numbers and draw an outline in their appropriate places. Then trace over
them with a wood-burner
4) Drill a hole in the center of the clock
5) Apply a coat of polyurethane to the clock. Allow it to dry, then do it once more.
6) Turn the clock onto its front and insert the clock mechanism in the drilled hole
7) Attach the hands on the front of the clock
8) Insert the batteries, set the time, and hang it on the wall
Wednesday 15 August 2012
Perfect Harvest Recipe
Perfect Harvest Recipe
If you're like me, sometimes you get in a rut with the same recipe over-and-over again, especially when you have one particular vegetable that grew particularly well. For me this year, it's potatoes. So I asked my Colombian friend if she had any good potato recipes, and she gave me a recipe for "Papas Churriadas" which uses entirely garden ingredients (except for the spices), so it's a perfect recipe for harvest time!
First, boil some potatoes until tender, but not falling apart. We used 8 potatoes to feed 4 adults and 4 children. Set these aside, drained.
Next, make a "guiso" (pronounced gee-so) which is a base for most Colombian dishes. Shred 6 onions and 4 tomatoes and put in a pan. Add "Triguisar" which is a spice you can find in International food stores. If you don't have an international food store near you, you can substitute roughly a tablespoon of cumin and a teaspoon each of garlic powder and turmeric (or to taste). Let the "guiso" reduce on medium-high heat until thick.
Add up to 1/2 cup milk and 4 pieces of shredded toast (or hard breadsticks, crackers, or any other hard grain product you have handy). Let it simmer for about 10 more minutes and take off the heat.
Use this topping on your potatoes as a delicious sauce (althought it tastes good on rice and chicken too!)
Friday 10 August 2012
Making Corn Oil
If you want to make your own organic corn oil (if, for example, you have a big corn harvest and have no idea what to do with it all) and you have made the Fruit Press that I shared with you awhile back, combine the two and do this!
http://www.ehow.com/how_5040521_make-corn-oil-home.html
http://www.ehow.com/how_5040521_make-corn-oil-home.html
Wednesday 8 August 2012
As Canadian as Apple Pie
I have canned so much raspberry jam, I'm done! The neighbour can have the rest of the berries until the end of the summer. The apples are just coming ready, so I found two recipes:
1) Homemade pectin from green apples (This is so I don't need to buy any more pectin for my canning next year);
2) Canned apple pie filling from ripe apples (A fairly simple recipe but the hard part is peeling, coring, and slicing the apples, made easier if you have an apple-corer).
The recipe for canned apple pie filling can be found here: http://allrecipes.com/recipe/canned-apple-pie-filling/detail.aspx
Monday 6 August 2012
The Fruits of Our Labour
If you're on my facebook, you would have seen a picture a couple days ago of one of my harvests. The garden is ready for harvest for some items. However I don't think I'll get any cucumbers this year because they started a bit late. So far I've gotten raspberries, rhubarb, and dill. The tomatoes are a good size but still green. The carrots and potatoes will be ready on time, and the onions are a bit small. The green onions were ready months ago!
I'm making wine from my raspberries as we speak (but I won't be able to tell you the results for several months).
I'm making wine from my raspberries as we speak (but I won't be able to tell you the results for several months).
Wednesday 1 August 2012
Raspberry Wine
I've been searching for more raspberry recipes after my husband cried "NO MORE JAM!!!" and I believe I've found it! Keep in mind all the recipes I post are not tested - I test them along with you! Let me know how yours turns out, if you decide to make it.
1) Boil a gallon of water
2) Put 4 lbs raspberries in the "fermentation bucket" (a container with
an airtight lid). Mash them a little.
3) Pour the boiling water over the mashed berries. Place the lid on
until the contents cool.
4) Add 3 lbs sugar and 1/4 oz yeast and stir. Close the lid, leaving it
to sit for 5 days. Stir three times per day.
5) Strain the raspberries from the liquid through a cheesecloth, pouring
the liquid into a 1-gallon jug.
6) Seal the jug with a cork or airlock and set in a warm, dark spot for
three months.
7) Siphon the liquid into wine bottles and seal with corks. This wine
does not require further aging although some people say it tastes best
after aging for one year.
Sunday 29 July 2012
Taking Care of the Home
I got a great compliment the other day. When I mentioned to my dad that I'd made another three jars of raspberry jam, he commented "Well, you're becoming a real homesteader now, making your own food." It made me feel quite proud.
But being a homesteader (to me) isn't just about having a garden and processing what comes out of it. It's reminiscent of pioneer times, when men worked from dawn to dusk in the fields and women worked in the home to make sure everything was ship-shape and the children were raised right. Yes, a part of that was making sure there was food on the table, but the larger part of it was taking care of all the details. Laundry had to be washed (but first the soap had to be made!). To have chicken for supper a chicken had to be raised, killed, plucked, and cooked. A simple breakfast of eggs meant going to gather them from the hen-house. Milk the cow twice a day. Sew the clothes, shear sheep, card and spin all the wool. The list goes on and on. Back then there was no "vegging in front of the TV" - there was always work to be done and a lazy person was frowned upon. Even their hobbies were constructive - knitting, sewing, carving, all produced useful items.
So the point of all this is to make you think: instead of sitting here in front of the computer, what could you be doing that is constructive and useful?
Like my mom always says, "Man may work from sun to sun, but a woman's work is never done!"
Saturday 21 July 2012
Fruit Press
As everyone knows, I'm on a kick to learn how to build things myself, so I found it really interesting when surfing on http://www.fruitshare.ca/ that they have an article on how to build your own fruit press (for apples or grapes, it lists, but I'm sure you could use it for other fruit too).
http://www.fruitshare.ca/wp-content/uploads/2012/02/fruit-press.pdf
http://www.fruitshare.ca/wp-content/uploads/2012/02/fruit-press.pdf
Wednesday 18 July 2012
Making Jam
Well the berries are ready for picking. Went out to the lake and got some saskatoons (but the baby ate them ALL... wow...) and now all the raspberries are ready. And I will have raspberries coming out my EARS this summer, so I've decided to make jam (even though my husband prefers raspberry milkshakes... there will be plenty for everyone!).
So here are some easy instructions on how to make raspberry jam. Head down to J&P to buy some liquid pectin to make the job super-easy! (NOTE: you will need a canning pot and jars with lids)
1) Pick the berries and squish them (aim for 6 cups squished berries, as this is what this recipe uses).
2) Sanitize the jars (if you boil them 5 more minutes it will get the same effect, but you may end up with mushy jam.
3) Measure out 7 cups of sugar (some recipes I've read would use up to 10-12 cups sugar for this amount of raspberries, but I don't want to get diabetes just from eating my jam!) and grab your packet of liquid pectin.
4) Stir the pectin and 2 cups sugar into the berries and put into a pot over medium to high heat and get to a solid boil (should take 5-10 minutes)
5) meanwhile, put the lids in warm (not boiling) water
6) add the rest of the sugar and bring to boil 1 more minute
7) you may skim the foam off at this point
8) use a teaspoon to take a bit of the jam out. Let it cool. This will show you the consistency of your jam.
9) (Optional) Let stand 5 minutes and stir
10) Fill the jars with the mixture and put the lids on.
11) Put the jars into the canning pot. Make sure there is at least 2 inches water above them. Boil for at least 5-10 minutes but any longer than that and the jam will be runny.
12) Lift the jars out and let them cool overnight in a draft-free place
13) After cooling overnight you can take the outer rings (not the actual lids) off, so they don't rust. Also check to see all the seals held. If not, you'll have to re-can them right away (within 24 hours of the last attempt) or refridgerate and use within the next few days.
These jars will be good for 6-12 months. Be sure to use a permanent marker (or label) to write down the jar contents and the date.
Happy canning!
Tuesday 19 June 2012
Off the Grid
Last night my mother and I were discussing living "off the grid". It's a great concept, but few of us realize how difficult it would be, especially with the amount of comforts we're accustomed to. For example, that hot shower you get every morning? Good luck. Living off the grid means providing your own sources of water, heat, and power if you want it.
There are many benefits to living off the grid though, if you can deal with the downsides of feeling like you're camping every single day. For example, you may not be able to play computer, but you'll have a six-pack washboard abs like you've only dreamed of! Why? Because of all the physical labour. There are animals to feed, potatoes to peel, wood to chop, every single moment is filled with work in order to survive and stock up for the times when you can't work (like in wintertime, when you can't be outside very much).
So here is my parting thought for the day, something for you to ponder:
If you were forced to live "off the grid" for an entire year (due to some sudden, unforeseen circumstance), would you have the skills necessary to do it?
Sunday 10 June 2012
Sewing Pants
Just found a great and easy instruction-manual for sewing pyjama pants. I love her idea of tucking one pant inside the other to sew the crotch seam. It really made it simple! I have successfully made my baby girl a new pair of pants in less than 20 minutes! Granted, they are simple, but they work. And children outgrew clothes so fast, it's tough to keep up. So without further ado, here is the link, have fun!
http://www.instructables.com/id/How-to-Sew-Your-Own-Pajama-Pants/
http://www.instructables.com/id/How-to-Sew-Your-Own-Pajama-Pants/
Monday 28 May 2012
Eating Organic
Here's a tongue twister for you: free farm fresh eggs! That's what we received on Sunday from a gentleman that we know. His hens are laying quite well, so he gives away the overage to his friends.
That is part of living naturally, eating organic, and being part of the bigger picture: if you can't provide something for yourself, barter with those who do, but stay local. Oftentimes there is someone in your community who grows/makes something that you never knew. Put up signs, or just use word-of-mouth in the coffee shop to let people know you're interested in buying organic. Especially bigger-ticket items like if a local farmer is butchering a cow, you can buy top-quality beef and freeze it and feed your family for a long time, knowing your meat has no additives or preservatives!
That is part of living naturally, eating organic, and being part of the bigger picture: if you can't provide something for yourself, barter with those who do, but stay local. Oftentimes there is someone in your community who grows/makes something that you never knew. Put up signs, or just use word-of-mouth in the coffee shop to let people know you're interested in buying organic. Especially bigger-ticket items like if a local farmer is butchering a cow, you can buy top-quality beef and freeze it and feed your family for a long time, knowing your meat has no additives or preservatives!
Sunday 20 May 2012
Making Yogurt-Cheese
So as a continuation of making yogurt, we're going to learn how to process it into cheese. Yogurt Cheese is supposedly milder and can substitute for either sour cream or cream cheese. It's also fairly easy to make.
1) Take some cheesecloth and wrap a portion of your yogurt.
2) Rig this bunched-up cheesecloth so that it hangs suspended over a plastic bowl (I tied either end of my cheesecloth-package with string underneath the bowl)
3) Set in fridge (for milder cheese) or in an undisturbed place (for stronger cheese) for up to 48 hours.
The liquid that drips out is whey, and you're left with the cheese inside the cheesecloth. The whey can be a refreshing drink... remember little Miss Muffet who ate her curds (cheese curds) and whey (to drink)? Obviously her parents had lots of milk in the house and liked to process it into different edible things!
However just be careful you don't make the same mistake I did... I didn't suspend my cheese high enough above the bottom of the bowl... and a LOT of whey dripped down and the hanging cheese sat in the liquid, which completely defeated the whole purpose. So make sure it's a deep bowl and high cheese!
Wednesday 16 May 2012
Making Yogurt
Everything tends toward disorder, says my father. That's why it feels like we're constantly cleaning house! Well the same principle holds true in the biological/chemical realm, which is where we get fermentation. Today we're going to use that to our advantage to make tasty homemade yogurt.
What you will need before you start:
- a non-metal mixing bowl and spoon
- store-bought yogurt (any size) which contains NO colours, flavours, sugars, or pectin. It must say on the container "contains live cultures" to work!
- milk
- honey to taste and your favourite berries
Instructions:
1) To the milk, add the store-bought yogurt (one part yogurt to six parts milk).
2) Heat mixture a little higher than room temperature. Behind the fridge is a good place, or in a very low-heat oven or on a heating pad. Keep heated for 4 hours for mild, drinkable yogurt, or 8 hours for dense, stronger yogurt.
3) Set aside some of the yogurt to start your next batch
4) Add flavours to your yogurt and put in the fridge and eat up!! Yogurt should keep in fridge for up to two weeks.
Please note I am learning along with you. I have not tested this recipe out yet - I will be making it today. Please feel free to leave comments, how your yogurt turned out, what "tweaks" you did, etc.!
Tuesday 15 May 2012
May 15, 2012
Step one of living naturally and self-sustained.... create a web presence! Welcome to my blog of how to be less chained to everything around you. In this blog we will journey together towards independence and rediscover our roots. Although this is all aimed at those living in Manitoba, Canada, the tips, advice, and ideas are applicable to everyone.
Subscribe to:
Posts (Atom)